Integrating Calendars
Calendars can be integrated in two ways - via Google Calendar ID, or a link to an iCalendar file (.ics).
iCalendar (.ics) file is a widely supported calendar file that is also available from other companies (Apple Calendar, Office Calendar and etc.).
Unfortunately in this document, we will explain Google integration only. Instructions on obtaining iCalendar links for other calendars can be found on the internet.
Google Calendar ID integrations only support public calendars, while iCalendar files can include private calendars too.
Integrating calendar via ID has the benefit of more deep integration - events will open in Google Calendar to be available for edit, once you click them in the dashboard gadget.
Integrate Calendar via iCalendar file (public/private calendar):
-
On your computer, open Google Calendar.
-
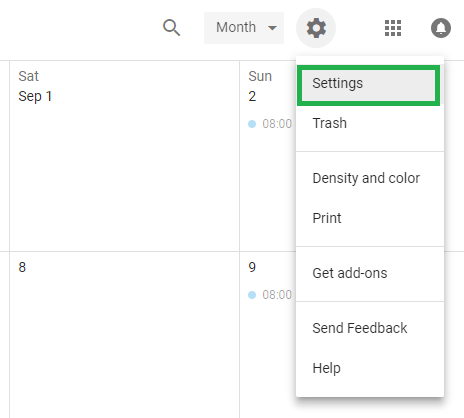
In the top right, click Settings (gear icon) and then Settings.

-
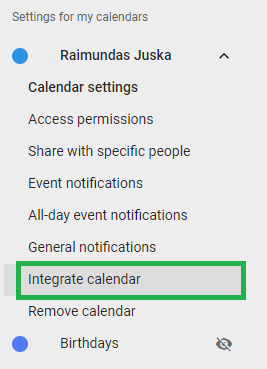
Navigate to the "Settings for my calendars" section on the menu on the left.
-
Click the name of the calendar you want to use.
-
Go to the "Integrate calendar" section.

-
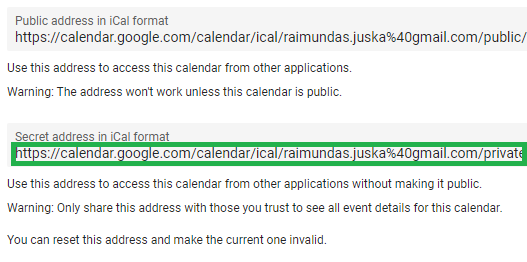
In the "Secret address in iCal format" section, click the URL.

-
Paste the link to the dashboard gadget configuration page.
Integrate Calendar via ID (public calendar):
Make your Google Calendar public:
-
In the Google Calendar interface, locate the "My calendars" area on the left.
-
Hover over the calendar you need and click the 3 dots menu button.
-
A pop-up menu will appear. Click Settings and sharing.
-
Check "Make available to public".
-
Make sure "See all event details" is selected.
Obtain your Google Calendar ID:
-
In the Google Calendar interface, locate the "My calendars" area on the left.
-
Hover over the calendar you need and click the 3 dots menu button.
-
A menu will appear. Click "Calendar settings".
-
In the "Integrate calendar" section of the screen, you will see your Calendar ID. It will look something like "abcd1234@group.calendar.google.com".
-
Paste the link to the dashboard gadget configuration page.
